Step-by-step guide: How to define build settings in HelpNDoc
When you’re ready to generate documentation, HelpNDoc allows you to define the location of your output files and select the templates that are used to generate your documentation. In addition, you can further customize settings such as color, font size, numbering style, and create conditional tags to tailor your documentation to support specific requirements.

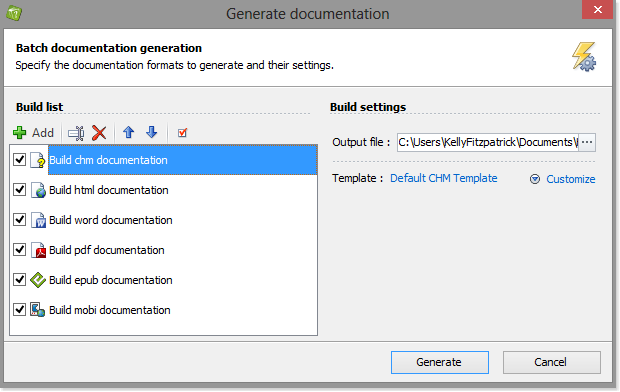
Your builds are listed along the left-hand side in your build list.
To view the settings for a build, click its name.
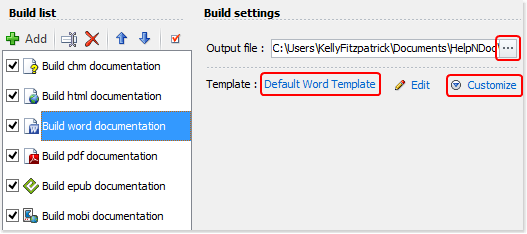
The steps for maintaining the output file and template as well as the settings for the output are outlined below.
Output file is where the documentation will be stored after it has been generated.
To select another location, click the button to the far right of the current output file pathway.
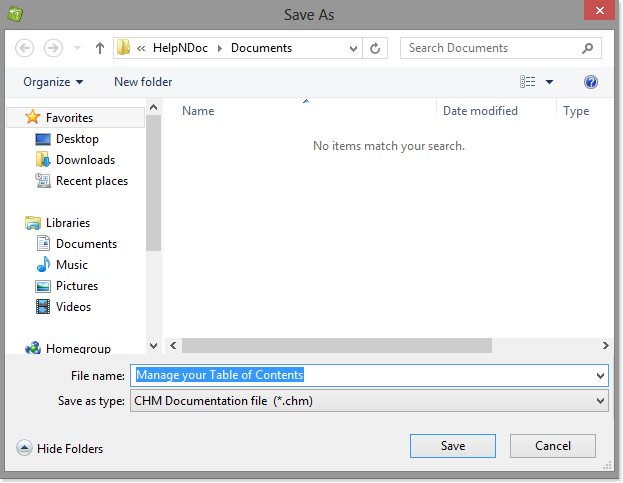
This displays a window that allows you to navigate to the new location.
By default, the file name is assigned the name of your project.
- To use this name, no update is needed.
- To assign a new name, enter it in ‘File name.’
Click Save in the lower right-hand corner to close the navigation window.
This displays the updated path and file name in your Generate Documentation window.
The next time you publish this output this documentation will be placed in this new location and be assigned the new name, if appropriate.
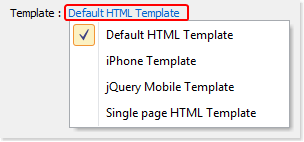
To select another template, click the current one.
This displays a menu of alternatives offered by HelpNDoc.
Select the one you’d like to use.
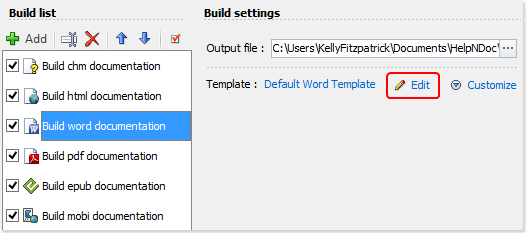
You can also define your own templates for outputs that use Word and PDF formats using the template editor.
To access it, click Edit. Further assistance is provided in another step-by-step guide: How to update your templates.
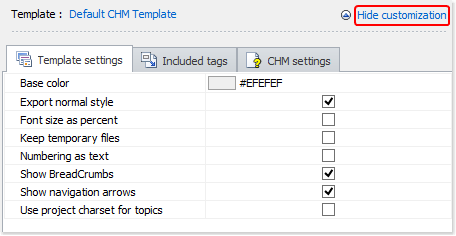
Customize displays the template settings and tags that are used when this output is generated. You may tailor these settings to support your specific requirements.
To maintain these settings, click Customize.
The first two tabs allow you to maintain settings for the template and define tags. If format-related settings are available, a third tab is displayed to provide you access to these settings also.
To collapse this information, click Hide customization.
Updates are saved automatically. When you’re done, you have three options:
- To publish your documentation, click Generate in the lower right-hand corner of the window.
- To close the window without publishing your documentation, you can click Cancel in the lower right-hand corner.
- To close the window without publishing your documentation, you can also click the X in the upper right-hand corner.
See also
- Secure Your PDF Documents Effortlessly with HelpNDoc
- Streamlined Build Asset Management and Table Formatting Defaults for Faster, More Organized Documentation in HelpNDoc 9.7
- New FTP Actions, Improved PDFs, Overridden Library Items, and More in HelpNDoc 9.0
- Empowering Technical Writers: Harnessing HelpNDoc's Override Features for Unlimited Documentation Variations
- How to add a cover image to ePub and Kindle eBooks