Step-by-step guide: How to maintain tags associated with output builds
It is possible to create an unlimited number of build outputs in HelpNDoc and for each of those, it is possible to indicate which conditional tags needs to be included. Content and topics tagged with included tags will be generated for that build while content tagged with others tags will be excluded.

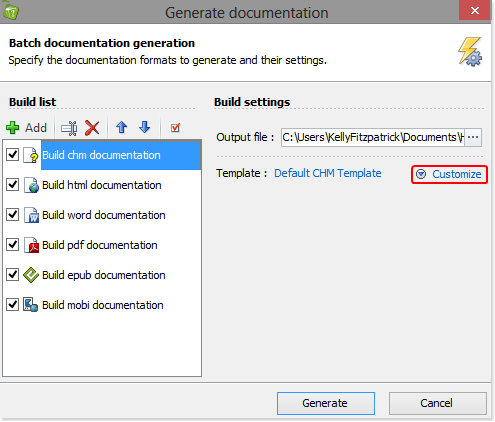
Click the top half of the Generate help button in the Project group of the Home ribbon tab to display the ‘Generate Documentation’ window.
Select the build in the list for which you’d like to view and update tags. If details about the build are not displayed, click Customize.
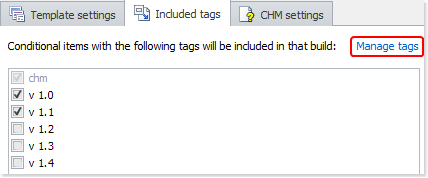
Click the Included tags tab to view tags associated with that specific build output.
Select the build in the list for which you’d like to view and update tags. If details about the build are not displayed, click Customize.
Click the Included tags tab to view tags associated with that specific build output.

Associated tags are checked and the standard tag associated with the build format is grayed out to indicate that it will always be used for that build.
To deactivate a tag, click the check mark to remove it.
To activate a tag, click the empty box.
To add new or delete existing custom tags, click the Manage tags link.
To deactivate a tag, click the check mark to remove it.
To activate a tag, click the empty box.
To add new or delete existing custom tags, click the Manage tags link.
Thanks to HelpNDoc’s flexible system, it is easy to create multiple variations of the same content in multiple formats: just create as many builds as needed and associate them with the desired tags and HelpNDoc will automatically generate the correct variations of your help and manuals.